Lets go to the GameActivity.java of your project – the only code file inside your src folder.
At the moment it looks rather uninteresting, but it actually introduces two important concept – layouts and the R variable.

Lets start with the R variable. It is the way you access the res folder from code. Android project will “magically” point to resources inside your res folder through this, keeping track of localisation, density and screensizes (if you support that) automatically. So if you need the app_name just write R.string.app_name and you have it available for use inside your program. Simples!
So, what is R.layout.main? That is a reference to main.xml layout in the res/layout folder, and in setContentView you declare that this activity uses this layout, and that is where it stops. If you open the main.xml file you can see the graphical layout, and if you are more explorative and open the xml view you’ll see that it is a LinearLayout containing a TextView with a text field pointing to the @string/hello value in strings.xml. You can find an intro about layouts here, and a list of tutorials about the different views here if you are interested.
It probably doesn’t come as a surprise when I tell you that the game layout is quite different from this. We need it to respond to user interaction and display smooth graphics. To do this we need to run two threads. If you aren’t familiar with threading, you should go and read this page (only page 1 is necessary fore this, as the others introduces “heavier” issues). The other thread we’ll need is writing all the graphics, whereas the “parent” thread will take care of user interaction (UI). The reason for splitting this is, that UI is notoriously know to create timing issues. E.g. if a user presses the touch screen how long does the user do this? this might create lags in the code, or the accelerometer might create jittering into the graphics views due to constant code running inside the accelerometer code block. By separating the code into different thread the graphics code gets an “equal” share of code time, and the flow of the code will seem more constant to the user.
Lets start in the low end off the pool. You can go and get the main.xml code. I won’t go into detail of this file, you should be able to “digest” it yourself. Notice the @string references, what do you think you need to do now to avoid errors? Furthermore the @+id declare ids that can be used in code later to reference and use the views of the layout programmatically.
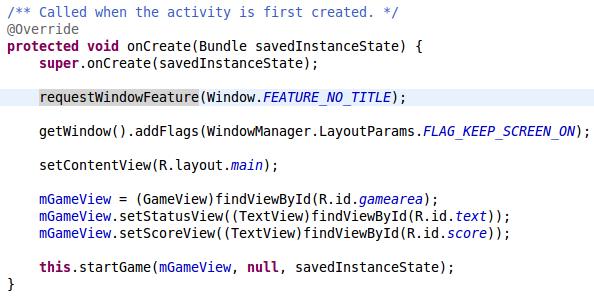
So if you change the onCreate to:
The first to lines removes the normal title and keeps the screen turned on (as you’d expect in a game).
The next line is similar to the old onCreate(), but after that we reference the different views of the GameView by utilising the ids that we created in mail.xml, and we start the game. Don’t worry, this isn’t magic, we haven’t create the GameView class yet nor the startGame() method, so lots of errors are turning up! In this tutorial we’ll look at the GameActivity class, so just rest assured that the errors will go away eventually when GameView, and as you’ll see shortly, GameThread are made.
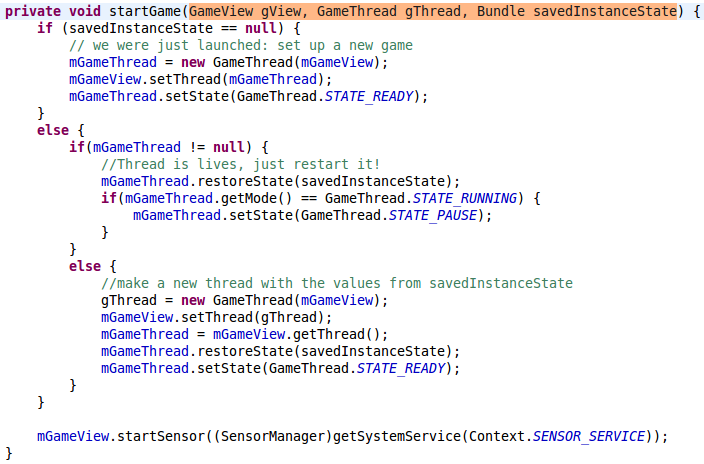
Lets take care of startGame(). There are three situations that this method needs to accommodate for. A fresh start, a restart where the thread isn’t existing, and where it exist from a previous game. (This last option shouldn’t really be used in this GameTutorial, as restarted games will just restart as paused games, but if you want to extend the game later on, you might want to change this.) Here is the code:
Remember that the thread states are states we’ll be creating later on, and simply are different states the game can be in. The last line starts the sensor of the devices, this we’ll implement inside the GameView class.
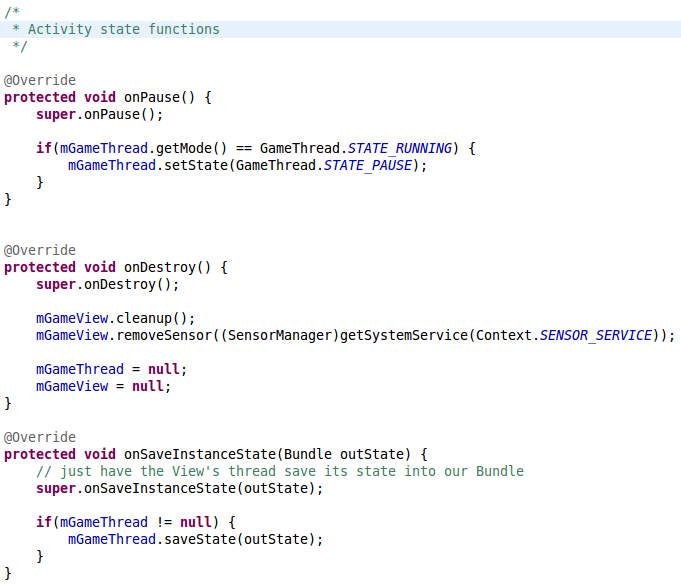
The next step is to manage the different states in the Activity’s life cycle. In this tutorial we don’t need to manage all of the states, only manage pausing, destroying and saving the game state. This works because we just pause the GameThread, and if the game returns without an actual destroy call then the GameView will just show a paused GameThread. If the game is destroyed then onCreate will manage everything else. So,
onPause() just Pauses the GameThread by changing the state. onDestroy() cleans up, and onSaveInstanceState() calls the GameThread.saveState() which add the game state into a Bundle. Bundle is an Android helper class for saving information using key and values. E.g. outState.putInt(“example”,1); would set the key “example” to one, and it can be retrieved by int i = outState.getInt(“example”); which would result in i == 1;
The Android system will take care of managing the actual storing of the Bundle.
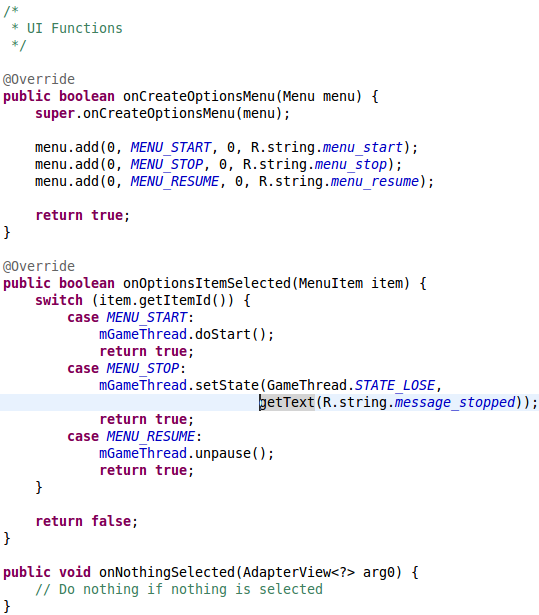
The last thing we need is some UI. Here we’ll use menus. The Activity class fully supports this through the onCreateOptionsMenu(), onOptionsItemSelected() and onNothingSelected(). What they do are quite self-explanatory, all you have to do is to override them in the GameThread class, and the menus will work when the user presses the Menu button on the device. You override them this way:
 arg0) { // Do nothing if nothing is selected }” width=”539″ height=”615″ />
Go here for a full explanation of menu management.The onCreateOptionsMenu() is called the first time the menu is called, and you just use the add() method to add new menu items. The MENU_START etc. values are just int values, which I’ve for convenience have created using class attributes:


This sentence “Get can go and get the main.xml code” does not make
sense. It’s in paragraph 6 🙂
done, it now reads “You can go….” Thanks Guy
One question : Where does “gamearea” is defined ?
Sorry – I’m not sure what you mean? Do you mean GameThread?
I am also confused as to where the gamearea, text and score are defined. I know it has something to do with the layout and main.xml but i do not know how to proceed
Ah, never mind, i was being silly and missed the link to main.xml
Hi. As a novice I’ve followed your game tutorial with a great pleasure but I am troubling with this xml files. Neither strings.xml or layout file main.xml are updated as a keep on coding your example code. As I’ve told, I am a novice, I’am googling it but I doubt if I’m searching the right terms. I am getting “id cannot be resolved or is not a field” error as well. Also, I can not reach to the icon images that I’ve put to the drawable folder(the same error exists). So if you help me with this by makin clear how to deal with main.xml or strings.xml files I would really really appreciate your help. Thanks in advance…
I’m happy the tutorial helps you. I know that there is a bug in the R variable functionality. If you copy and past complete file into the res folder, instead of write it on the keyboard, then rarely Eclipse (or Android SDK) doesn’t update the R variable at all. I am uncertain how to “get it back”, as I’ve never had the issue personally. I’d try and clean the project, rebuild it, perhaps shut Eclipse down and open it again, to see if it “finds” R. Otherwise, try from scratch without copying the files into res, that should work..