Posts Tagged ‘Android game development’


21.02.2012

BoB bug

posted by Karsten

in Uncategorized

I was teaching Android Game App development today. The session where I go through all of the code. The session as such went quite well IMHO.

Except, I “obviously” plugged my own games, as examples of game representations within a game. A student of mine downloaded BoB, and played it hanging about while waiting for a mate finishing asking me questions. To my surprise BoB crashed on him!

Apart from being only “slightly” embarrassing this was a great opportunity for a more in depth bug report. Not only had I observed him play a normal game, but also seen him finish, so I knew that the bug was in the transition between playing and finishing a game. So, I got him to file a bug report, and my was it interesting!

I can now locate the bug in the Scoreloop API, perhaps not surprising as the BoB game is using an old’ish version of the library, but nonetheless it is reassuring to know that the bug is related to failing to sending the highscore correctly, and not timing out, therefore not allowing the surfacedeletion to happen. This makes Android timeout, and that seemingly blows up everything within the system, as my code relies on the normal OS life cycle of an app. I must find a proper solution to this problem, but at least I now know the cause of the problem.

Oh, and btw, how we can teach Computer Science in a lecture hall with no adequate internet / 3g access is beyond me…

Share
28.11.2011

Santa’s Mess – review

posted by Karsten

in Uncategorized

Yay – my game Santa’s Mess have been nicely reviewed by gametrender.net. It is nice when someone else likes your game…

Share
05.11.2011

Santa’s Mess

posted by Karsten

in Uncategorized

I’m on a roll! I’ve just created a new Mahjong styled game using a Cristmas theme, just to get people in to that seasonal spirit! I hope you guys enjoy it, you can download it here!


Share
27.07.2011

Ndoo – a review of the experience

posted by Karsten

in Uncategorized

I received an email with the title “Hominize Android, you profit more than Android!” some weeks ago, and I was so close at just deleting it. This is my usual response to mails that seems to be spam, however, as this mail at least had two words in the title I found quite interesting, I read it.

It was an ad for Android developers for a Chinese market place called Ndoo. I thought no harm done in contacting them, and see how that works, with the full awareness that if they would ask me for cash I’d be out! So I sent an email saying that I was interested, but wouldn’t be able to translate my apps into Chinese. The answer came almost prompt (I think they work long hours…), that they could translate my apps for free!! No cash exchange at any point! Additionally at this moment they only accept free/ad based apps, as payments haven’t been set up yet. So this is I no way spam, I think they are doing this to get the market up and running fast.

They’ve now translated the first app for me, and apart for a few glitches in communication (both from my side and theirs) the experience has been very smooth. They have also uploaded the game to the market. You can see it here. My stats show that people are downloading from it, slower than SlideME and Google, but much faster than e.g. Amazon (there you seemingly need to be an app rockstar to get downloads as there are no embedded advertising for new apps), getjar or appslib. It will be every interesting to follow the development.

I can only recommend this to other developers who might want to try something different with their apps.

Share
14.06.2011

Android Game Development Tutorial – part V

posted by Karsten

in Uncategorized

previous

We have come to the final part of this tutorial series. The actual game thread. This is where the “fun” happens. Unfortunately, I should say this already, I’ve purposefully made this a rather dull game. A small ball that you can move around the screen, scoring points by hitting the side walls, and ending the game by moving out of the top or bottom of the screen. The reason for this is that *YOU* should innovate here. You can go and see what I’ve done up until now here, I hope you’ll test them out, and (if you like them) give feedback on the games on the market, but what I’d really enjoy seeing is somebody creating other games based on this. Please if you do, go ahead, and make a comment on this blog post about it, who knows, others might see it and download your game as well 😉

Hiho – enough words from “the sponsor”, i.e. me. Lets get on with it.

First of all create the GameThread class, it should extend the thread class.

public class GameThread extends Thread

Next add these attributes:

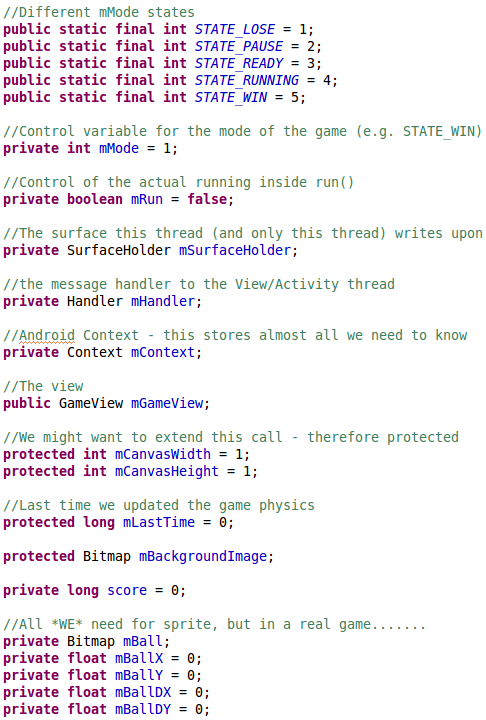
//Different mMode states 	public static final int STATE_LOSE = 1; 	public static final int STATE_PAUSE = 2; 	public static final int STATE_READY = 3; 	public static final int STATE_RUNNING = 4; 	public static final int STATE_WIN = 5;  	//Control variable for the mode of the game (e.g. STATE_WIN) 	private int mMode = 1;  	//Control of the actual running inside run() 	private boolean mRun = false; 		 	//The surface this thread (and only this thread) writes upon 	private SurfaceHolder mSurfaceHolder; 	 	//the message handler to the View/Activity thread 	private Handler mHandler; 	 	//Android Context - this stores almost all we need to know 	private Context mContext; 	 	//The view 	public GameView mGameView;  	//We might want to extend this call - therefore protected 	protected int mCanvasWidth = 1; 	protected int mCanvasHeight = 1;  	//Last time we updated the game physics 	protected long mLastTime = 0;   	protected Bitmap mBackgroundImage; 	 	private long score = 0; 	 	//All *WE* need for sprite, but in a real game....... 	private Bitmap mBall; 	private float mBallX = 0; 	private float mBallY = 0; 	private float mBallDX = 0; 	private float mBallDY = 0;

Most of these are explained through the comments, or will become obvious late in this part. The mMode is the states that we have frequently used in the previous parts of the tutorial. Next we construct the GameThread, we need two, because GameView.surfaceChanged() needs two different ones:

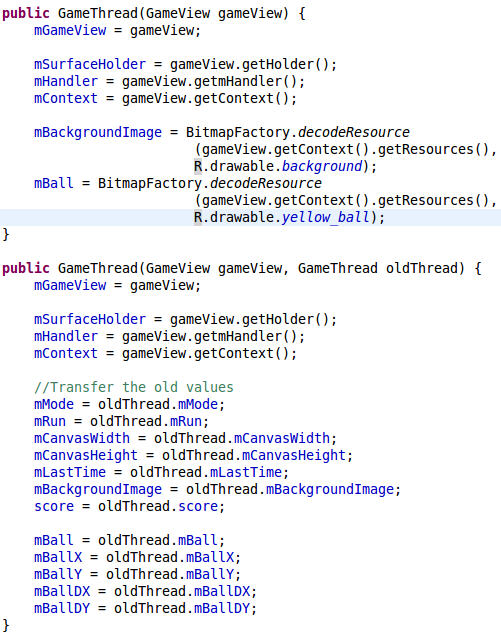
public GameThread(GameView gameView) {		 		mGameView = gameView; 		 		mSurfaceHolder = gameView.getHolder(); 		mHandler = gameView.getmHandler(); 		mContext = gameView.getContext(); 		 		mBackgroundImage = BitmapFactory.decodeResource 							(gameView.getContext().getResources(),  							R.drawable.background); 		mBall = BitmapFactory.decodeResource 							(gameView.getContext().getResources(),  							R.drawable.yellow_ball); 	} 	 	public GameThread(GameView gameView, GameThread oldThread) {		 		mGameView = gameView; 		 		mSurfaceHolder = gameView.getHolder(); 		mHandler = gameView.getmHandler(); 		mContext = gameView.getContext(); 		 		//Transfer the old values 		mMode = oldThread.mMode; 		mRun = oldThread.mRun; 		mCanvasWidth = oldThread.mCanvasWidth; 		mCanvasHeight = oldThread.mCanvasHeight; 		mLastTime = oldThread.mLastTime; 		mBackgroundImage = oldThread.mBackgroundImage; 		score = oldThread.score; 		 		mBall = oldThread.mBall; 		mBallX = oldThread.mBallX; 		mBallY = oldThread.mBallY; 		mBallDX = oldThread.mBallDX; 		mBallDY = oldThread.mBallDY; 	}

Notice how we use the BitmapFactory class to decode resources from R.drawable, and that we just use the old mBall attribute to get the bitmap in the new GameThread when we have an old thread available. Otherwise nothing new to see here, and cleanup() is also quite mundane now:

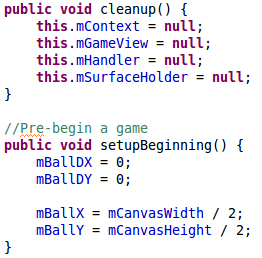
public void cleanup() {		 		this.mContext = null; 		this.mGameView = null; 		this.mHandler = null; 		this.mSurfaceHolder = null; 	} 	 	//Pre-begin a game 	public void setupBeginning() { 		mBallDX = 0;  		mBallDY = 0; 		 		mBallX = mCanvasWidth / 2; 		mBallY = mCanvasHeight / 2; 	}

so lets introduce the first gaming method. We just setup a ball with no initial movements in the middle of the canvas. This method is called by the doStart() method,

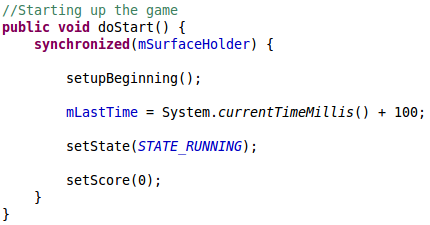
//Starting up the game 	public void doStart() { 		synchronized(mSurfaceHolder) { 			 			setupBeginning(); 			 			mLastTime = System.currentTimeMillis() + 100;  			setState(STATE_RUNNING); 			 			setScore(0); 		} 	}

which prepares the game state and set the mode to running.

Earlier in GameActivity we set up a system to save and restore states. This system needs these two methods:

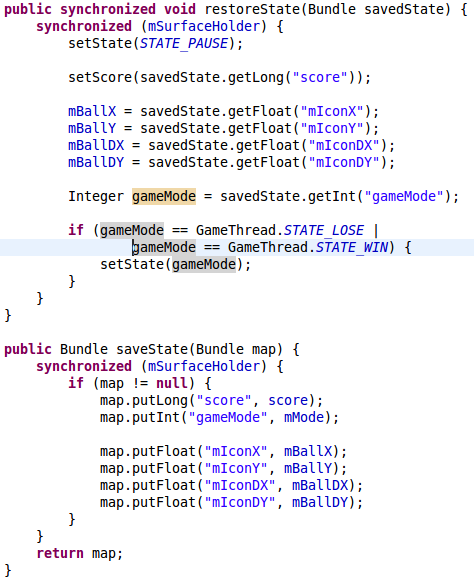
public synchronized void restoreState(Bundle savedState) { 		synchronized (mSurfaceHolder) { 			setState(STATE_PAUSE);  			setScore(savedState.getLong("score"));  			mBallX = savedState.getFloat("mIconX"); 			mBallY = savedState.getFloat("mIconY"); 			mBallDX = savedState.getFloat("mIconDX"); 			mBallDY = savedState.getFloat("mIconDY"); 			 			Integer gameMode = savedState.getInt("gameMode"); 			 			if (gameMode == GameThread.STATE_LOSE |  					gameMode == GameThread.STATE_WIN) { 				setState(gameMode); 			} 		} 	} 	 	public Bundle saveState(Bundle map) { 		synchronized (mSurfaceHolder) { 			if (map != null) { 				map.putLong("score", score); 				map.putInt("gameMode", mMode); 				 				map.putFloat("mIconX", mBallX); 				map.putFloat("mIconY", mBallY); 				map.putFloat("mIconDX", mBallDX); 				map.putFloat("mIconDY", mBallDY); 			} 		} 		return map; 	}

Notice how the Bundle class is used to save and restore the values of the class attributes.

The most important part of a game is the game loop:

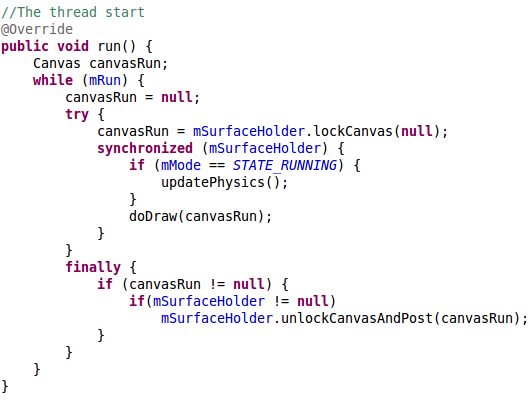
@Override 	public void run() { 		Canvas canvasRun; 		while (mRun) { 			canvasRun = null; 			try { 				canvasRun = mSurfaceHolder.lockCanvas(null); 				synchronized (mSurfaceHolder) { 					if (mMode == STATE_RUNNING) { 						updatePhysics(); 					} 					doDraw(canvasRun); 				} 			}  			finally { 				if (canvasRun != null) { 					if(mSurfaceHolder != null) 						mSurfaceHolder.unlockCanvasAndPost(canvasRun); 				} 			} 		} 	}

This loop runs until mRun is false, which can happen in setRunning(). We synchronize on the mSurfaceHolder to avoid multiple draws (don’t mind if you don’t get this), and then update the physics and draw on the canvas, and that is basically all that is needed to run a game.

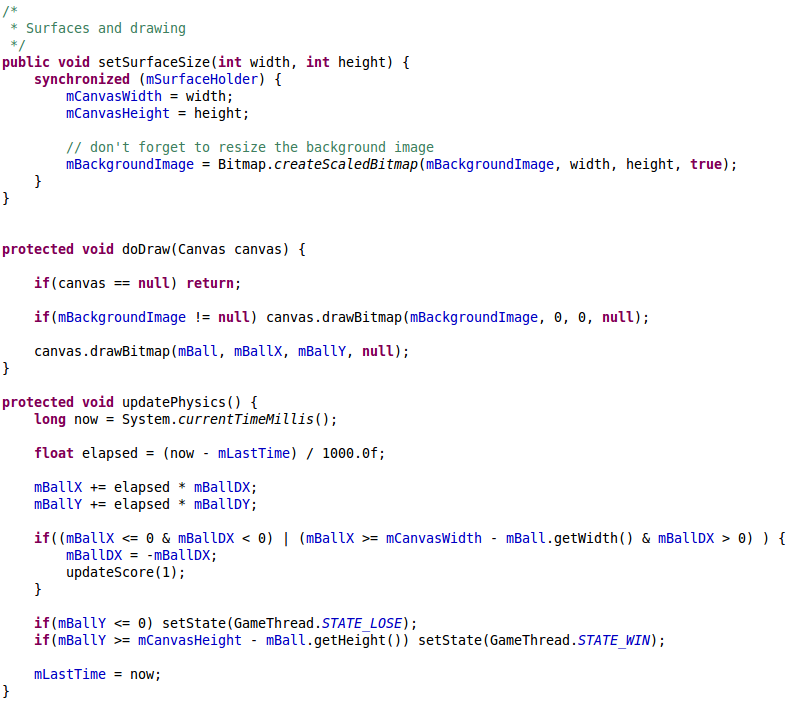
/* 	 * Surfaces and drawing 	 */ 	public void setSurfaceSize(int width, int height) { 		synchronized (mSurfaceHolder) { 			mCanvasWidth = width; 			mCanvasHeight = height;  			// don't forget to resize the background image 			mBackgroundImage = Bitmap.createScaledBitmap(mBackgroundImage, width, height, true); 		} 	}   	protected void doDraw(Canvas canvas) { 		 		if(canvas == null) return;  		if(mBackgroundImage != null) canvas.drawBitmap(mBackgroundImage, 0, 0, null); 		 		canvas.drawBitmap(mBall, mBallX, mBallY, null); 	} 	 	protected void updatePhysics() { 		long now = System.currentTimeMillis(); 				 		float elapsed = (now - mLastTime) / 1000.0f;  		mBallX += elapsed * mBallDX; 		mBallY += elapsed * mBallDY; 		 		if((mBallX <= 0 & mBallDX < 0) | (mBallX srcset== mCanvasWidth – mBall.getWidth() & mBallDX > 0) ) { mBallDX = -mBallDX; updateScore(1); } if(mBallY <= 0) setState(GameThread.STATE_LOSE); if(mBallY >= mCanvasHeight – mBall.getHeight()) setState(GameThread.STATE_WIN); mLastTime = now; }” width=”790″ height=”705″ />

The setSurfaceSize() is called before the game is started and sets up an appropriately sized background. doDraw() simply takes the background bitmap and and ball bitmap and draw them on the canvas. The updatePhysics moves the ball using the DX and DY values. Notice that the elapse time between updates are used to ensure a correct size of the move. The “game logic” has also been put here, with an update of the score (updateScore() will be created later) , and checks to see if the game is won or lost.

The user interface control methods are

/* 	 * Control functions 	 */ 	 	//Finger touches the screen 	public boolean onTouch(MotionEvent e) { 		if(e.getAction() != MotionEvent.ACTION_DOWN) return false; 		 		if(mMode == STATE_READY || mMode == STATE_LOSE || mMode == STATE_WIN) { 			doStart(); 			return true; 		} 		 		if(mMode == STATE_PAUSE) { 			unpause(); 			return true; 		} 		 		synchronized (mSurfaceHolder) { 				this.actionOnTouch(e); 		} 		  		return false; 	} 	 	private void actionOnTouch(MotionEvent e) { 		//TODO do something 	}  	//The Accellerometer has changed 	public void onSensorChanged(SensorEvent event) { 		synchronized (mSurfaceHolder) { 			if (event.sensor.getType() == Sensor.TYPE_ORIENTATION) { 				mBallDX -= 1.5f*event.values[2]; 				mBallDY -= 1.5f*event.values[1]; 			} 		} 	}

The onTouch() is there to allow starting the game, and it is prepared for in game interaction as well. The onSensorChanged() method is called every time the sensor changes, and just changes the ball’s DX and DY values.

To manage the different states the game can be in, the following methods are created

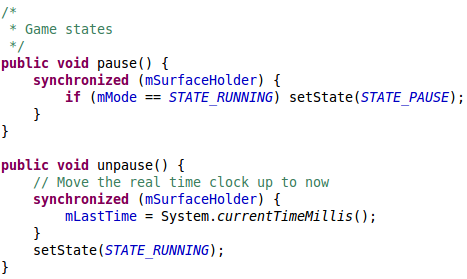
/* 	 * Game states 	 */ 	public void pause() { 		synchronized (mSurfaceHolder) { 			if (mMode == STATE_RUNNING) setState(STATE_PAUSE); 		} 	} 	 	public void unpause() { 		// Move the real time clock up to now 		synchronized (mSurfaceHolder) { 			mLastTime = System.currentTimeMillis(); 		} 		setState(STATE_RUNNING); 	}

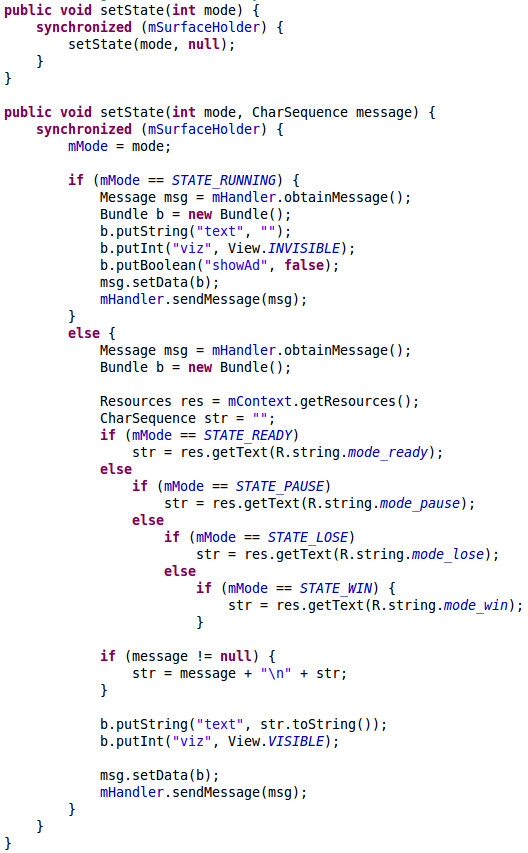
and the setState methods manages changes in states and sends messages to GameView to display messages to the user

//Send messages to View/Activity thread 	public void setState(int mode) { 		synchronized (mSurfaceHolder) { 			setState(mode, null); 		} 	}  	public void setState(int mode, CharSequence message) { 		synchronized (mSurfaceHolder) { 			mMode = mode;  			if (mMode == STATE_RUNNING) { 				Message msg = mHandler.obtainMessage(); 				Bundle b = new Bundle(); 				b.putString("text", ""); 				b.putInt("viz", View.INVISIBLE); 				b.putBoolean("showAd", false);	 				msg.setData(b); 				mHandler.sendMessage(msg); 			}  			else {				 				Message msg = mHandler.obtainMessage(); 				Bundle b = new Bundle(); 				 				Resources res = mContext.getResources(); 				CharSequence str = ""; 				if (mMode == STATE_READY) 					str = res.getText(R.string.mode_ready); 				else  					if (mMode == STATE_PAUSE) 						str = res.getText(R.string.mode_pause); 					else  						if (mMode == STATE_LOSE) 							str = res.getText(R.string.mode_lose); 						else  							if (mMode == STATE_WIN) { 								str = res.getText(R.string.mode_win); 							}  				if (message != null) { 					str = message + "\n" + str; 				}  				b.putString("text", str.toString()); 				b.putInt("viz", View.VISIBLE);  				msg.setData(b); 				mHandler.sendMessage(msg); 			} 		} 	}

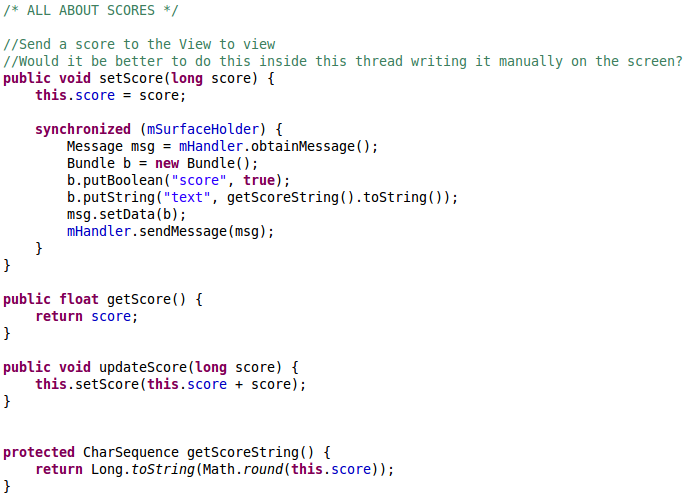
Handler.sendMessage is used to send the message to GameView. This method is also used to send scores to GameView:

/* ALL ABOUT SCORES */ 	 	//Send a score to the View to view  	//Would it be better to do this inside this thread writing it manually on the screen? 	public void setScore(long score) { 		this.score = score; 		 		synchronized (mSurfaceHolder) { 			Message msg = mHandler.obtainMessage(); 			Bundle b = new Bundle(); 			b.putBoolean("score", true); 			b.putString("text", getScoreString().toString()); 			msg.setData(b); 			mHandler.sendMessage(msg); 		} 	}  	public float getScore() { 		return score; 	} 	 	public void updateScore(long score) { 		this.setScore(this.score + score); 	} 	 	 	protected CharSequence getScoreString() { 		return Long.toString(Math.round(this.score)); 	}

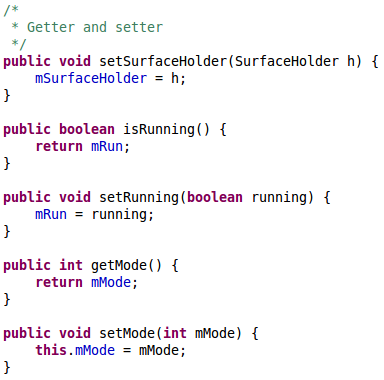
and last we create a few getters and setters

/* 	 * Getter and setter 	 */	 	public void setSurfaceHolder(SurfaceHolder h) { 		mSurfaceHolder = h; 	} 	 	public boolean isRunning() { 		return mRun; 	} 	 	public void setRunning(boolean running) { 		mRun = running; 	} 	 	public int getMode() { 		return mMode; 	}  	public void setMode(int mMode) { 		this.mMode = mMode; 	}

and that is it, the game is finished! I almost forgot, you can get the GameThread.java file for your convenience. Now you can test if it works in the emulator, unfortunately within the emulator the accelerometer won’t work (unless you set it up using this method), so if you want to test using touchscreen just change the actionOnTouch() method and use the MotionEvent object to get hold of x and y coordinates. Obviously if you have an Android phone you can just use that for debugging…

Please let me know if you find any mistakes in this tutorial. Otherwise,

THE END

http://code.google.com/p/openintents/wiki/SensorSimulator
Share
14.06.2011

Android Game Development Tutorial – part IV

posted by Karsten

in Uncategorized

previous

In this part of the tutorial we’ll be looking at the GameView class, which is maintaining the View of the Game, UI and handling messages from the Thread (e.g. score changes).

Create a new class through the Eclipse add class functionality (Right click the project -> add -> class)

You should create a Class with the name GameView that has the superclass android.view.SurfaceView and make it implement SurfaceHolder.Callback (This might create some errors, but we will implement the missing methods later):

public class GameView extends SurfaceView implements SurfaceHolder.Callback

We extend SurfaceView because that is the view that provides a drawable surface, and by implementing SurfaceHolder.Callback the Android system can call our class whenever there are changes to the screen. We need the following attributes:

private volatile GameThread thread;  	private SensorEventListener sensorAccelerometer;  	//Handle communication from the GameThread to the View/Activity Thread 	private Handler mHandler; 	 	//Pointers to the views 	private TextView mScoreView; 	private TextView mStatusView;

The views comes from the layout, and gives us a way to show text on the screen on top of the actual game. The Handler is the class that will recieve messages from the GameThread, and the sensorAccelerometer is an EventHandler that will handle calls from the Accelerometer. Lets create the constructor:

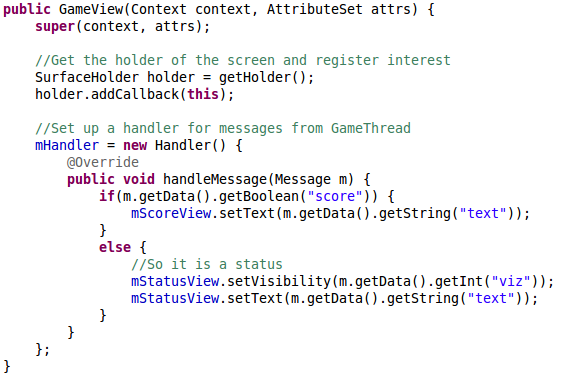
public GameView(Context context, AttributeSet attrs) { 		super(context, attrs);  		//Get the holder of the screen and register interest 		SurfaceHolder holder = getHolder(); 		holder.addCallback(this); 		 		//Set up a handler for messages from GameThread 		mHandler = new Handler() { 			@Override 			public void handleMessage(Message m) { 				if(m.getData().getBoolean("score")) { 					mScoreView.setText(m.getData().getString("text")); 				} 				else {		 					//So it is a status 					mStatusView.setVisibility(m.getData().getInt("viz")); 					mStatusView.setText(m.getData().getString("text")); 				}  			} 		}; 	}

All this does is setting up the holder and add the object as a SurfaceView.Holder callback. The rest of the code creates an anonymous class that handle the messages from the GameThread. It can receive scores and otherwise just display the sent text in the mStatusView. You might remember that the onDestroy() method of the GameActivity would call a cleanup() method of GameView, which should look like this:

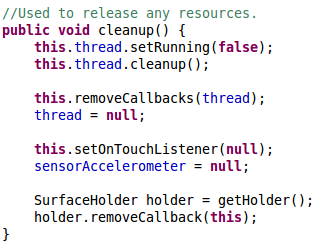
//Used to release any resources. 	public void cleanup() { 		this.thread.setRunning(false); 		this.thread.cleanup(); 		 		this.removeCallbacks(thread); 		thread = null; 		 		this.setOnTouchListener(null); 		sensorAccelerometer = null; 		 		SurfaceHolder holder = getHolder(); 		holder.removeCallback(this); 	}

This cleans up all possible resources of the Class. The  method actually has a small risk of a NullException, albeit very small, as the thread is call without a check to see if it has been set up. Should probably be changed 😉

The next methods are the getters and setters. There is only one of them with any real interest:

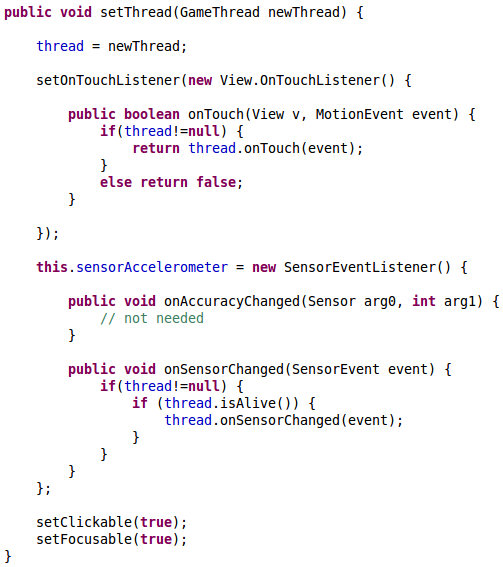
public void setThread(GameThread newThread) {  		thread = newThread;  		setOnTouchListener(new View.OnTouchListener() {  			public boolean onTouch(View v, MotionEvent event) { 				if(thread!=null) { 					return thread.onTouch(event); 				} 				else return false; 			}  		});  		this.sensorAccelerometer = new SensorEventListener() {  			public void onAccuracyChanged(Sensor arg0, int arg1) { 				// not needed 			}  			public void onSensorChanged(SensorEvent event) { 				if(thread!=null) { 					if (thread.isAlive()) { 						thread.onSensorChanged(event); 					} 				} 			} 		};  		setClickable(true); 		setFocusable(true); 	}

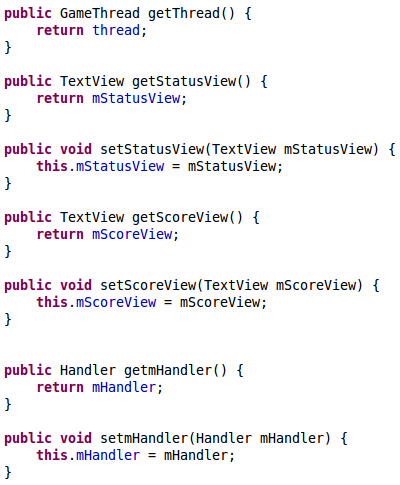
We start out setting the GameThread, and after that we set up the onTouchListener and SensorEventListener and all we do is to relay the events to the GameThread. The rest of the getters and setters look like this:

public GameThread getThread() { 		return thread; 	}  	public TextView getStatusView() { 		return mStatusView; 	}  	public void setStatusView(TextView mStatusView) { 		this.mStatusView = mStatusView; 	} 	 	public TextView getScoreView() { 		return mScoreView; 	}  	public void setScoreView(TextView mScoreView) { 		this.mScoreView = mScoreView; 	} 	  	public Handler getmHandler() { 		return mHandler; 	}  	public void setmHandler(Handler mHandler) { 		this.mHandler = mHandler; 	}

Next we’ll manage the screen changes. First we’ll automatically pause the game if the window goes out of focus for what ever reason:

@Override 	public void onWindowFocusChanged(boolean hasWindowFocus) { 		if(thread!=null) { 			if (!hasWindowFocus) 				thread.pause(); 		} 	}

Next we’ll implement the changes of the surface. Let’s start with the creation of  the surface:

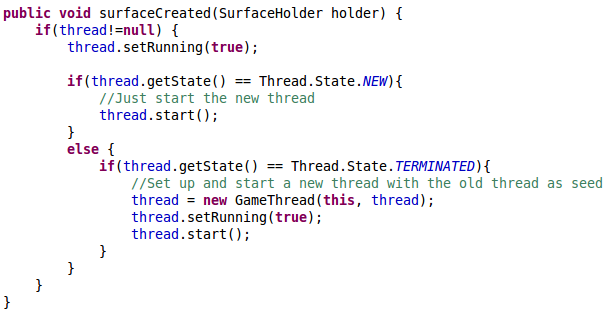
public void surfaceCreated(SurfaceHolder holder) { 		if(thread!=null) { 			thread.setRunning(true); 			 			if(thread.getState() == Thread.State.NEW){ 				//Just start the new thread 				thread.start(); 			} 			else { 				if(thread.getState() == Thread.State.TERMINATED){ 					//Set up and start a new thread with the old thread as seed 					thread = new GameThread(this, thread); 					thread.setRunning(true); 					thread.start(); 				} 			} 		} 	}

The thread.setRunning(true); method call is one we’ll implement, which set the game circle of the thread to running. Next we check to see if the GameThread  is new, and therefore hasn’t run before, or if the GameThread has run before but the user has returned to the game. If it is a new game a simple start of the thread is necessary, however if the player returns to the game from somewhere else it isn’t that simple. Stopping and restarting of threads within Android is deprecated, so the developer has to maintain this manually. The easiest way to do this is to take the old terminated thread, and send it to a new GameThread and copy all of the attributes of the old thread into the new, thus starting the new Thread within the same state as the old thread. This should ensure that the user experience is correct, and the game restarts where the user stopped.

The other two surface related methods are:

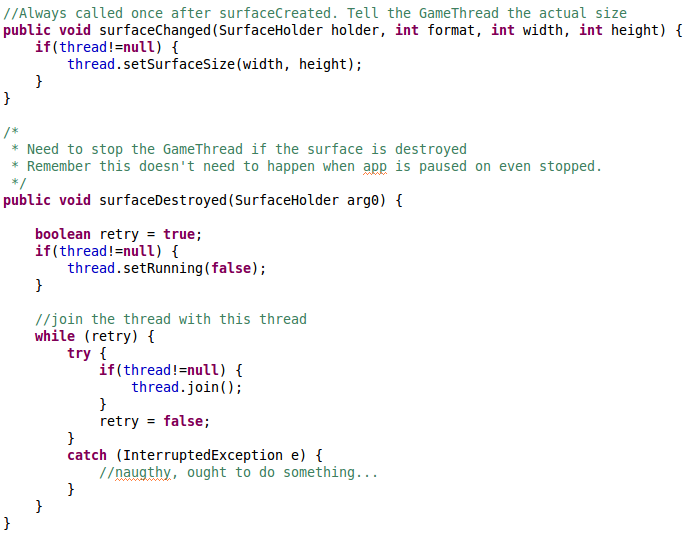
//Always called once after surfaceCreated. Tell the GameThread the actual size 	public void surfaceChanged(SurfaceHolder holder, int format, int width, int height) { 		if(thread!=null) { 			thread.setSurfaceSize(width, height);			 		} 	}  	/* 	 * Need to stop the GameThread if the surface is destroyed 	 * Remember this doesn't need to happen when app is paused on even stopped. 	 */ 	public void surfaceDestroyed(SurfaceHolder arg0) { 		 		boolean retry = true; 		if(thread!=null) { 			thread.setRunning(false); 		} 		 		//join the thread with this thread 		while (retry) { 			try { 				if(thread!=null) { 					thread.join(); 				} 				retry = false; 			}  			catch (InterruptedException e) { 				//naugthy, ought to do something... 			} 		} 	}

The surfaceChanged() simply sends the new width and height to the thread. This should happen once and only once for each surface (we don’t allow screen “flipping” here). The surfaceDestroyed() method stops the GameThread by letting it run out of the game loop within the GameThread.

The last thing we need is the two sensor methods we called earlier:

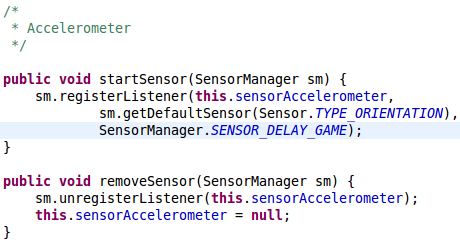
/* 	 * Accelerometer 	 */  	public void startSensor(SensorManager sm) { 		sm.registerListener(this.sensorAccelerometer,  				sm.getDefaultSensor(Sensor.TYPE_ORIENTATION),	 				SensorManager.SENSOR_DELAY_GAME); 	} 	 	public void removeSensor(SensorManager sm) { 		sm.unregisterListener(this.sensorAccelerometer); 		this.sensorAccelerometer = null; 	}

The start sensor sets up the accelerometer. You can use this approach to set up many different sensors, you can go here to see the different possibilities.

Please download GameView.java, if you need it.

next

Share
14.06.2011

Android Game Development Tutorial – part III

posted by Karsten

in Uncategorized

previous

Lets go to the GameActivity.java of your project – the only code file inside your src folder.

At the moment it looks rather uninteresting, but it actually introduces two important concept – layouts and the R variable.

super.onCreate(savedInstanceState); setContentView(R.layout.main);

Lets start with the R variable. It is the way you access the res folder from code. Android project will “magically” point to  resources inside your res folder through this, keeping track of localisation, density and screensizes (if you support that) automatically. So if you need the app_name just write R.string.app_name and you have it available for use inside your program. Simples!

So, what is R.layout.main? That is a reference to main.xml layout in the res/layout folder, and in setContentView you declare that this activity uses this layout, and that is where it stops. If you open the main.xml file you can see the graphical layout, and if you are more explorative and open the xml view you’ll see that it is a LinearLayout containing a TextView with a text field pointing to the @string/hello value in strings.xml. You can find an intro about layouts here, and a list of tutorials about the different views here if you are interested.

It probably doesn’t come as a surprise when I tell you that the game layout is quite different from this. We need it to respond to user interaction and display smooth graphics. To do this we need to run two threads. If you aren’t familiar with threading, you should go and read this page (only page 1 is necessary fore this, as the others introduces “heavier” issues). The other thread we’ll need is writing all the graphics, whereas the “parent” thread will take care of user interaction (UI). The reason for splitting this is, that UI is notoriously know to create timing issues. E.g. if a user presses the touch screen how long does the user do this? this might create lags in the code, or the accelerometer might create jittering into the graphics views due to constant code running inside the accelerometer code block. By separating the code into different thread the graphics code gets an “equal” share of code time, and the flow of the code will seem more constant to the user.

Lets start in the low end off the pool. You can go and get the main.xml code. I won’t go into detail of this file, you should be able to “digest” it yourself. Notice the @string references, what do you think you need to do now to avoid errors? Furthermore the @+id declare ids that can be used in code later to reference and use the views of the layout programmatically.

So if you change the onCreate to:
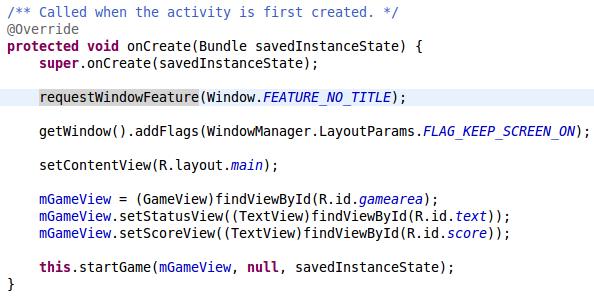
super.onCreate(savedInstanceState); requestWindowFeature(Window.FEATURE_NO_TITLE); getWindow().addFlags(WindowManager.LayoutParams.FLAG_KEEP_SCREEN_ON); setContentView(R.layout.main); mGameView = (GameView)findViewById(R.id.gamearea); mGameView.setStatusView((TextView)findViewById(R.id.text)); mGameView.setScoreView((TextView)findViewById(R.id.score)); this.startGame(mGameView, null, savedInstanceState);

The first to lines removes the normal title and keeps the screen turned on (as you’d expect in a game).

The next line is similar to the old onCreate(), but after that we reference the different views of the GameView by utilising  the ids that we created in mail.xml, and we start the game. Don’t worry, this isn’t magic, we haven’t create the GameView class yet nor the startGame() method, so lots of errors are turning up! In this tutorial we’ll look at the GameActivity class, so just rest assured that the errors will go away eventually when GameView, and as you’ll see shortly, GameThread are made.

Lets take care of startGame(). There are three situations that this method needs to accommodate for. A fresh start, a restart where the thread isn’t existing, and where it exist from a previous game. (This last option shouldn’t really be used in this GameTutorial, as restarted games will just restart as paused games, but if you want to extend the game later on, you might want to change this.) Here is the code:
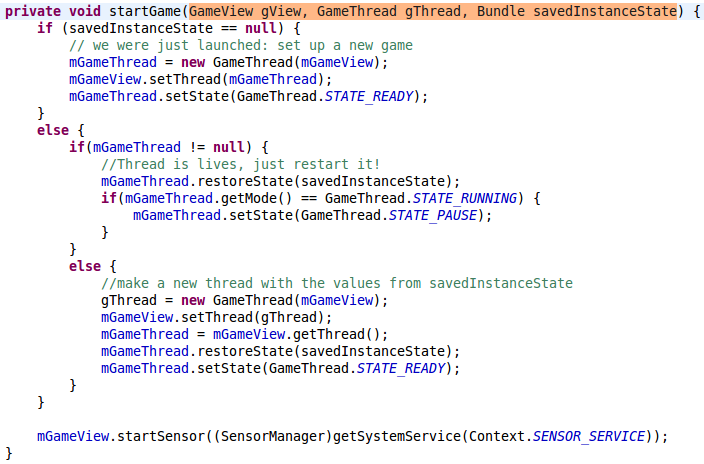
 

private void startGame(GameView gView, GameThread gThread, Bundle savedInstanceState) {    	         if (savedInstanceState == null) {             // we were just launched: set up a new game         	mGameThread = new GameThread(mGameView);         	mGameView.setThread(mGameThread);             mGameThread.setState(GameThread.STATE_READY);         }          else {         	if(mGameThread != null) {         		//Thread is lives, just restart it!         		mGameThread.restoreState(savedInstanceState);         		if(mGameThread.getMode() == GameThread.STATE_RUNNING) {         			mGameThread.setState(GameThread.STATE_PAUSE);         		}         	}         	else {         		//make a new thread with the values from savedInstanceState         		gThread = new GameThread(mGameView);         		mGameView.setThread(gThread);         		mGameThread = mGameView.getThread();         		mGameThread.restoreState(savedInstanceState);         		mGameThread.setState(GameThread.STATE_READY);         	}         }                  mGameView.startSensor((SensorManager)getSystemService(Context.SENSOR_SERVICE));     }

Remember that the thread states are states we’ll be creating later on, and simply are different states the game can be in. The last line starts the sensor of the devices, this we’ll implement inside the GameView class.

The next step is to manage the different states in the Activity’s life cycle. In this tutorial we don’t need to manage all of the states, only manage pausing, destroying and saving the game state. This works because we just pause the GameThread, and if the game returns without an actual destroy call then the GameView will just show a paused GameThread. If the game is destroyed then onCreate will manage everything else. So,
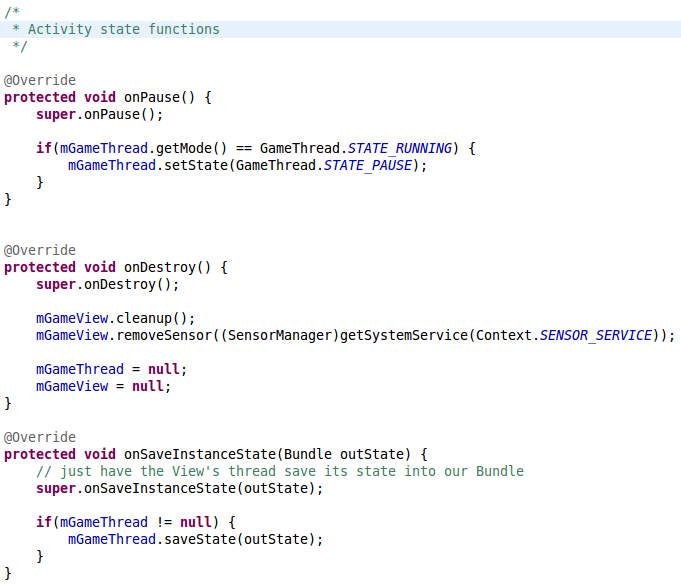
/* 	 * Activity state functions 	 */ 	     @Override     protected void onPause() {         super.onPause();                  if(mGameThread.getMode() == GameThread.STATE_RUNNING) {         	mGameThread.setState(GameThread.STATE_PAUSE);         }     }           @Override 	protected void onDestroy() { 		super.onDestroy();     	     	mGameView.cleanup();         mGameView.removeSensor((SensorManager)getSystemService(Context.SENSOR_SERVICE));                  mGameThread = null;         mGameView = null; 	}              @Override     protected void onSaveInstanceState(Bundle outState) {         // just have the View's thread save its state into our Bundle         super.onSaveInstanceState(outState);          if(mGameThread != null) {         	mGameThread.saveState(outState);         }     }

onPause() just Pauses the GameThread by changing the state. onDestroy() cleans up, and onSaveInstanceState() calls the GameThread.saveState() which add the game state into a Bundle. Bundle is an Android helper class for saving information using key and values. E.g. outState.putInt(“example”,1); would set the key “example” to one, and it can be retrieved by int i = outState.getInt(“example”); which would result in i == 1;

The Android system will take care of managing the actual storing of the Bundle.

The last thing we need is some UI. Here we’ll use menus. The Activity class fully supports this through the onCreateOptionsMenu(), onOptionsItemSelected() and onNothingSelected(). What they do are quite self-explanatory, all you have to do is to override them in the GameThread class, and the menus will work when the user presses the Menu button on the device. You override them this way:
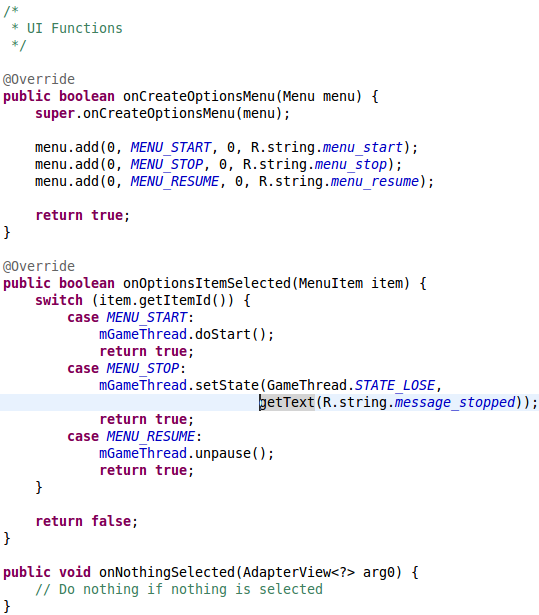
/*      * UI Functions      */          @Override     public boolean onCreateOptionsMenu(Menu menu) {         super.onCreateOptionsMenu(menu);                  menu.add(0, MENU_START, 0, R.string.menu_start);         menu.add(0, MENU_STOP, 0, R.string.menu_stop);         menu.add(0, MENU_RESUME, 0, R.string.menu_resume);          return true;     }          @Override     public boolean onOptionsItemSelected(MenuItem item) {         switch (item.getItemId()) {             case MENU_START:                 mGameThread.doStart();                 return true;             case MENU_STOP:    			     			mGameThread.setState(GameThread.STATE_LOSE,      								getText(R.string.message_stopped));                 return true;             case MENU_RESUME:                 mGameThread.unpause();                 return true;         }          return false;     }  	public void onNothingSelected(AdapterView<? srcset= arg0) { // Do nothing if nothing is selected }” width=”539″ height=”615″ />

Go here for a full explanation of menu management.The onCreateOptionsMenu() is called the first time the menu is called, and you just use the add() method to add new menu items. The MENU_START etc. values are just int values, which I’ve for convenience have created using class attributes:

private static final int MENU_RESUME = 1;     private static final int MENU_START = 2;     private static final int MENU_STOP = 3;      private GameThread mGameThread;     private GameView mGameView;

You can get the complete GameActivity file here
next

Share
14.06.2011

Android Game Development Tutorial – part II

posted by Karsten

in Uncategorized

previous

Time to create a project!

If you have never made an Android project before, then I’d suggest to make a Hallo World project first. Do it on your own in Eclipse. The default project that is created is a Hallo World stub project anyway. You can find help here if you aren’t familiar with Eclipse. If you are interested in the folders and files that is created (I sure was when I did this the first time) then this page explains them.

Otherwise go ahead and create a project for the game tutorial. I called my project  Tutorialgame, the Application name “Tutorial Game”, and the package name com.karlund.tutorialgame. Obviously change that to a package namespace that make sense to you. Just remember to change all references to your namespance, even the ones in the xml layouts (so you must read through them, this is the single highest possibility of bugs following this tutorial). I usually create an Activity (the main component of an Android app) which I in this example called GameActivity and I set the minimum SDK version to 4, which is Android SDK 1.6 – the most common starting point for support at the time of writing (e.g. admob needs this level).

This provides you with a stub project (Hallo World), which we’ll change in the rest of the tutorial.

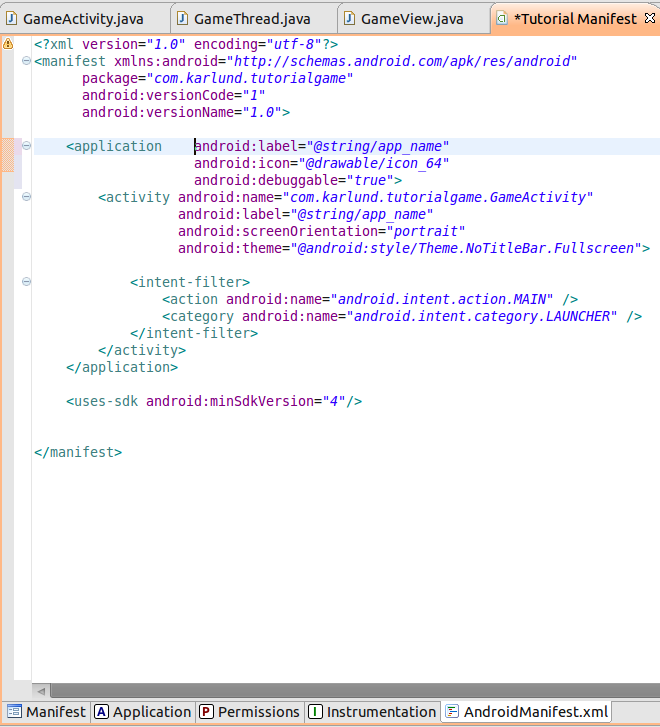
Lets examine the AndroidManifest.xml file (click the file in the Package Explorer, and press the tab “AndroidManifest.xml” underneath the appearing window:

AndroidManifest.xml

If you aren’t familiar with XML, then, welcome to the worribleness of it. It shouldn’t be too difficult to figure out though, if you need some help with understanding it you can find some help here.

The manifest file is where apps declare their capabilities, needs, core attributes  and intents. You can find a full intro here, but I’ll go through some of the important elements in this post.

As you can see all of the information we put into the Eclipse “New Android Project” dialogbox are present here. The android:versionCode and android:versionName are settings that you can use when you update your app. The Android Market (and alternatives) will use the versionCode to test if an upgrade is necessary on the handset (should be an increasing integer scheme) and the Name should be the human readable usually in the normal versioning style (e.g. 1.2.1).

An app can consist of many applications and activities, but we keep it simple here with “only” one application with one activity.

The android:label with the application tag specifies the human readable name of the application. “@string/app_name” introduces the resources management in Android projects. @string refers to the strings.xml file under the res/values folder. If you open it you’ll find it contains Name/Value pairs of strings (you can add other types than strings later if you want to), that can be accessed from all parts of the project (and you’ve just seen how you do it from xml files). This is a great system that not just aid the developer keeping the code clean, but also helps with localisation of the code. If you want to change the human readable name of the app, you can just change the value of app_name in the strings.xml file, simple as that!

Likewise the android:icon specifies the icon. You’ll notice that I’ve changed that already. Yours will read “@drawable/icon”. @drawable works like @strings, but refers to the res/drawable folders (e.g. drawable-hdpi). This is the first complicated issue we stumble upon. If you have heard of “fragmentation” of the Android platform, then this is the most common source of this. Screens on the Android phones comes, unlike the iPhone, in many sizes, resolutions and densities, and to support all of them can be a pain (I know – I’ve tried to in Rune Escape), especially if you want a consistent look’n’feel across all types of devices. These folders help you to do that, and you can create other kinds of drawable folders than the ones you are given by default. It might be too early to dive into this already, if you really want to go to this page for an introduction, otherwise just delete the folders and create a new folder called “drawable” and add these images to the folder:

icon_64.png

yellow_ball.png

background.png

This is the “old” way of handling graphics, all in one folder, and see what happens after density scaling has happened. Not the best way, but as long as you know that you really should change this approach before releasing an app to the market place, then this is fine for now. It will work, it just might look awful, and believe me, it probably will anyway, because the graphics I just gave you are quite, hmmn, crude anyway! Well, enough about graphics 😉

Next thing is the actual activity. Activities are the components that users normally “use”. This is where all the logics go. Here, we are just declaring then, so that the Android eco-system knows about the activities this app creates – very similar to the application statements except for the intent-filter. Intents are callable actions that outside apps can call. It is for instance through this system that Android “magically” knows that the browser can view http:// pages and that Android Market can display market:// sources. What we declare in the two lines of the intent-filter here is that this app can be called as a MAIN app (we won’t be creating a main, it is maintained for us), which means it can start from scratch without any incoming data, furthermore, the android.intent.category.LAUNCHER declares that this intent, and therefore the activity, should be shown in the launcher menu of the phone. More info can be found here, if you want to know more at this point….

This is all that this manifest declares, the next step is actual programming – Yay!

next

Share
14.06.2011

Android Game Development Tutorial – part I

posted by Karsten

in Uncategorized

previous

Ok, here we go! Let’s go and develop a game…

I assume that you are sat comfortably and that you have Eclipse installed with the adb plugin and the Android API setup correctly.

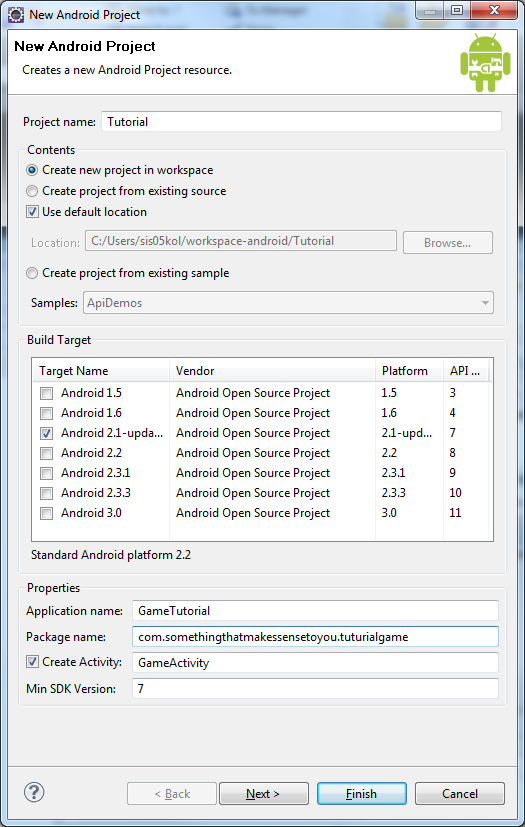
The first step is to set up an Android Project. You go to File -> New – > Android Project (Might be “hiding” under “Other…”), which gives you:

Under Package name I used “com.karlund.tutorialgame”, which makes sense to me. I’ve selected API level 7 because my phone has that level, but there will not be anything that conflicts with any of the levels, so you could use level 3.

The “Create Activity” filed, is setting the name of the starting class of the project. A bit similar to the main function in standard Java, but different in the sense that it will provide a class that is intended to control the life cycle of the app (see this blog post). The rest of the fields ought to be self-explanatory.

After filling this form in and pressing “Finish”, you’ll get a complete Hello World project. To see it  run press the AVD Manager button  to start up an Android emulator.

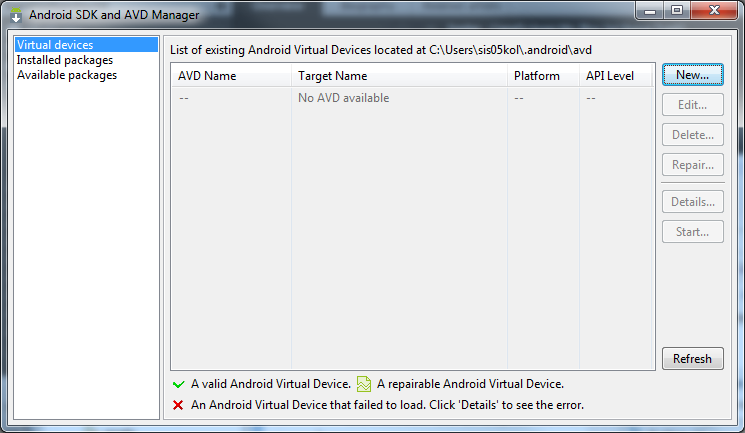
If it is empty like above then there isn’t any available. Press new:

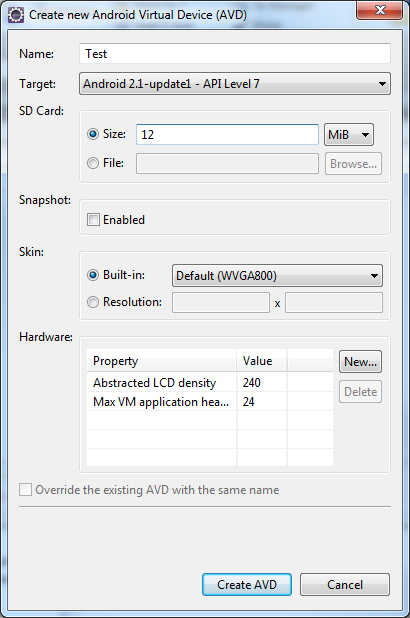
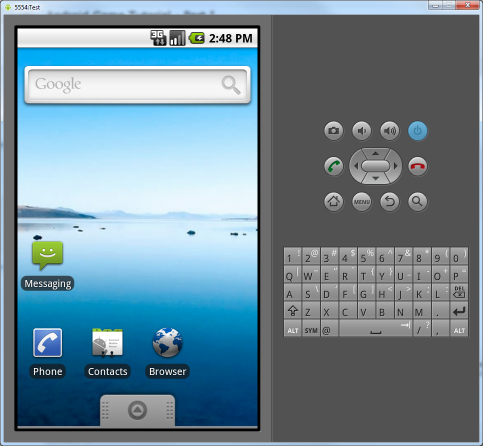
The Name can be anything you fancy. It is important to choose a target which is higher or equal to the API level that we develop for in the project. Likewise it is also important that the SD Card is bigger than 8MiB, otherwise you might get into trouble, as in it won’t work at all (yes, I did spend a long day once finding out). I personally quite like the default Skin, and I usually don’t need any special Hardware setting, but you can add some if you fancy. Otherwise just create it, and start it from the AVD Manager. This will give you an emulator like this (On a Windows machine in G21 at University of Reading you need to follow android instructions for it to work):


If you are not familiar with Java, this is where you should stop up and go to the Android dev site and look at what they have to say about this Hello World. After that focus on some of the code and look at the differences between C++ and Java. The languages are actually very similar. You might also benefit from online C++ vs Java site like http://pages.cs.wisc.edu/~hasti/cs368/JavaTutorial/ which although being old might help you. (Most newer resources are usually looking at C++ coming from Java…)

Once you done that you can come back and follow the rest of the tutorial, or try and change parts of the Hello World example to see what it does…

next

Share