Ok, here we go! Let’s go and develop a game…
I assume that you are sat comfortably and that you have Eclipse installed with the adb plugin and the Android API setup correctly.
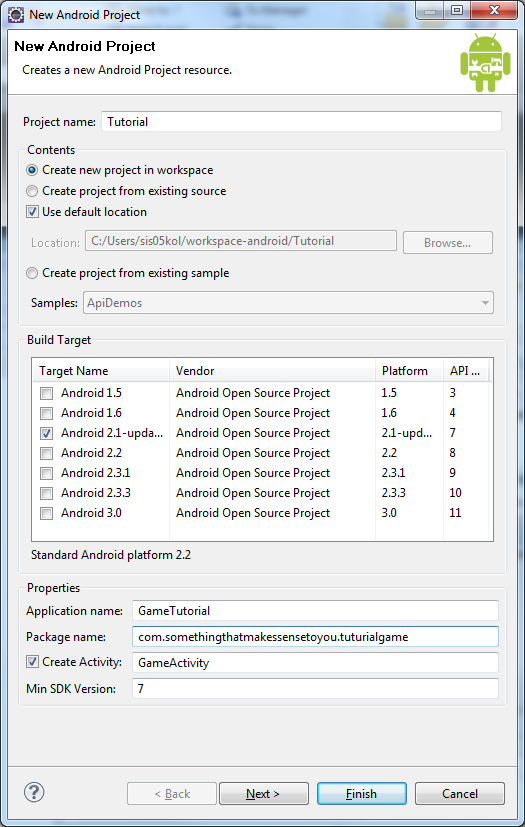
The first step is to set up an Android Project. You go to File -> New – > Android Project (Might be “hiding” under “Other…”), which gives you:
Under Package name I used “com.karlund.tutorialgame”, which makes sense to me. I’ve selected API level 7 because my phone has that level, but there will not be anything that conflicts with any of the levels, so you could use level 3.
The “Create Activity” filed, is setting the name of the starting class of the project. A bit similar to the main function in standard Java, but different in the sense that it will provide a class that is intended to control the life cycle of the app (see this blog post). The rest of the fields ought to be self-explanatory.
After filling this form in and pressing “Finish”, you’ll get a complete Hello World project. To see it run press the AVD Manager button ![]() to start up an Android emulator.
to start up an Android emulator.

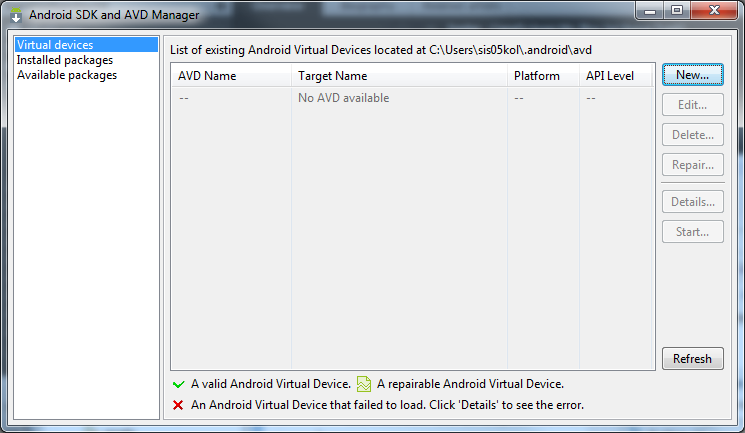
If it is empty like above then there isn’t any available. Press new:
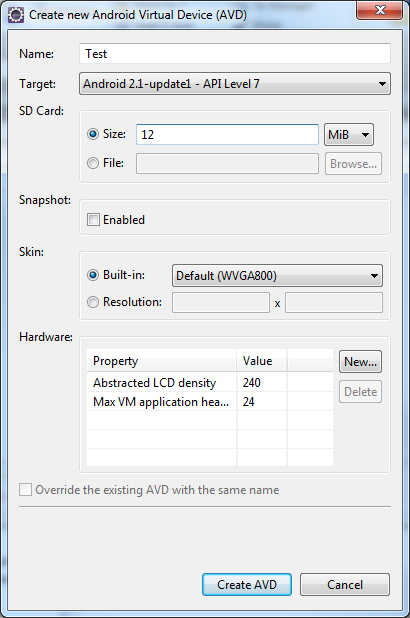
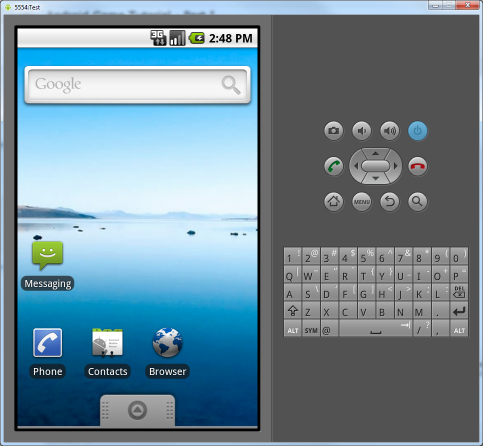
The Name can be anything you fancy. It is important to choose a target which is higher or equal to the API level that we develop for in the project. Likewise it is also important that the SD Card is bigger than 8MiB, otherwise you might get into trouble, as in it won’t work at all (yes, I did spend a long day once finding out). I personally quite like the default Skin, and I usually don’t need any special Hardware setting, but you can add some if you fancy. Otherwise just create it, and start it from the AVD Manager. This will give you an emulator like this (On a Windows machine in G21 at University of Reading you need to follow android instructions for it to work):
If you are not familiar with Java, this is where you should stop up and go to the Android dev site and look at what they have to say about this Hello World. After that focus on some of the code and look at the differences between C++ and Java. The languages are actually very similar. You might also benefit from online C++ vs Java site like http://pages.cs.wisc.edu/~hasti/cs368/JavaTutorial/ which although being old might help you. (Most newer resources are usually looking at C++ coming from Java…)
Once you done that you can come back and follow the rest of the tutorial, or try and change parts of the Hello World example to see what it does…


“I assume that you are sat comfortably and that you have Eclipse installed with the adb plugin and the Android API setup correctly.” – nope. That’s the hard part 😉
Not if you are in one of the Uni labs, where I had set it up.
Oh, or on one of my machines where it seems easy… 😀
[…] Setting up a Virtual Machine: http://oster-lundqvist.com/karsten/?p=4892 […]